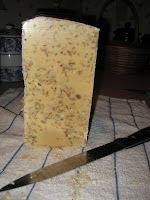
My favorite soap of all time is a cobblestone batch (on the right) I made out of unscented goats milk and chunks and scraps off all the other batches I had made before. The chunks were all different scented soaps, but in the context of the plain goats milk, the final scent just smells clean. It has great bubbles but is not at all drying. It made a huge batch, so almost 3 years later, I still have a few bars. I got the idea from a bar (on the left) that I had bought at the Wind Mill Market in Penn Yan years ago. I loved the bar and spent $5 or $6 for it, but never used it. It was too special.
I had 4# of soap scraps - the slivers of bars from the shower, trimmings, and end pieces from the loaf and tube molds. I think I am just about set for soap for the winter, so this will probably be the last batch of the year. I'm using Dr. Bob's Basic Four Oil Soap II recipe.
Step 1: Grate the scraps. I decided to go with a grated consistency this time. I want to see what it is like. Some scraps were pretty old and pretty hard. I was afraid of burning out the salad shooter, so I hand grated some or it.
Step 2: Got the goats milk out of the freezer to defrost the night before..
Step 3: Measure the oils. I didn't have enough coconut oil or palm oil. I wound up using up all of the leftover soap oils in the house: palm kernel oil, Shea butter, almond oil, cocoa butter, and a pound of lard. I know that different oils have different saponification values, and ideally you should run it through a calculator to make sure you are still within range. But there is a pretty big range to work with and these were pretty small percentages of the whole batch, so I decided to wing it. But I admit, that's risky and best practice is to always use a lye calculator.
Step 4: Dissolve lye in the semi frozen goats milk slush. This time it turned bright orange. I've read about that happening, but have never experienced it. Usually, it is a creamy yellow.
Step 5: Mix the lye and the oils. It filled my soap pot. It came to trace really easily. I turned around to help line the molds and it was done. Maybe it traced so easily because it is such a large batch. No scent again because I did not want it to clash with the scents in the scraps.
I checked it in half an hour and the big box mold has a heat heave in it. You can see the steam under the plastic of the bag around the edges due to the heat. I put it on a wire rack to help it cool.
Step 7: Time to un-mold and cut it. It is plenty hard enough. Ten hours isn't that long, but it is the texture of firm cheese and cut smoothly. I was hoping for a somewhat whiter bar but with all the oils I used and the orange goats milk, you get what you get. I got 53 bath sized bars. I used a wavy putty knife I found at a hardware store to cut it.
Step 8: Find a place for all of this soap to cure for 6 weeks...
I love that I can make something so wonderful out of things that a could be considered discards.


You soaps look so amazing! Great job. I love goats milk soap...
ReplyDelete