Bird in Hand Farm

Bird in Hand Farm is an imaginary place.


Sunday, August 29, 2010

Cheater Camp Fire

 
Each summer we rent a house or cabin in a lake and spend a week fishing, exploring, and relaxing.  They all have fire pits, but this is the first summer that we have had a successful fire.  Even with sending the kid to go collect every stick in sight, we have struggled.  The problem is that lakeside, everything gets and stays so darn damp that the firewood had trouble drying out and catching.  It just occurred to me right now that we could go buy firewood.  We have always tried to use the wood at the campsite.  Cheapskates.

This year we again have the little kid collect sticks and we used the "wet" wood.  Here is what we did differently...  We used one of those fake fireplace logs under the real firewood.

For the first 45 min, only the fake log burned.  The sticks didn't even catch.  But the wood steamed and sizzled and slowly some cracks appeared in the wood.  Finally, it went "whoosh" and everything caught.  Until that point we had to listen to the little kid ask again and again when she could roast marshmallows.

We had a great fire.  We roasted marshmallows.  You can learn a lot about someone about how they like their marshmallows.  The farmer likes his on fire.  The kid does not.  We made a wish on the first star of the evening.  I think it was Venus.  We listened to some big fish splash in the lake and the crickets.  We saw the moon rise.  We also had one "uninvited" guest.  Maybe he liked the warmth of the fire.  He got so close I thought he was going to hitch a ride home in one of the farmer's pockets.

Friday, August 27, 2010

Skinny Cat Update

Why?
It's not her thyroid.   The tests all came back looking beautiful.


They x-rayed her.  No masses but it did confirm just how stubborn and strong she can be. 
Give me the cheese!


More blood work.  No infection.  Stool samples were normal.  Basically ruled out inflammatory bowel disease.  Actually, all of her tests results came back looking quite good.  So why is she getting so skinny?


The vet prescribed Purina Gastroenteric Formula and Flagyl.  She seems to like the Purina.  She is the dominant cat in the household so there is no worries about her getting the right food.  She arrive first and eats what we put down.  We still have to wait several days for the Flagyl to arrive.

The mystery continues.

Thursday, August 26, 2010

Chicken stock

Why don't people make stock anymore?  Maybe it's because we don't eat  whole chickens.  We eat "sanitized", carefully prepared chicken breasts.  The farmer baked a chicken a few days ago and we had carrots and celery left over from making tomato soup.  Add to that, the juice left over from making tomato sauce, and we had the makings for an amazing stock.

Ingredients:
1 chicken carcass
3 quarts of tomato juice from the tomato sauce endeavor.
All of the celery left in the fridge (5 or 6 stalks)
All of the carrots left in the fridge (4 or 5 carrots)
3 big onions

Looks yucky, but tastes good.
Throw the chicken carcass into the pot.  This one had lemon halves in it, they went in too.  Cut the carrots and celery into big chunks.  Make sure there are no celery leaves.  The farmer says that they make the stock bitter.  Cut the onions in half, don't bother removing the brown paper skins.  Everything goes in the pot with enough water to cover the carcass.

Bring to a boil and then simmer for an hour.  Once it has cooled, strain it through a fine mesh sieve and freeze in containers.  That's it.  Minimal effort for amazing flavor.  We got enough for three soups. 

Wednesday, August 25, 2010

Tomatillos

I've heard of them.  I've never seen one.  I doubt I have ever eaten one.  Ten of them came in the box last week.

Do a web search on tomatillos and salsa verde comes up over and over.  The farmer chose a really simple one from All Recipes.


Green Salsa

Ingredients:

  • 8 tomatillos, husked
  • 3 shallots - We used "bunching onions" from the CSA box
  • 2 cloves garlic, peeled
  • 1 (4 ounce) can chopped green Chile peppers
  • 1/4 cup chopped fresh cilantro
  • 1 fresh jalapeno pepper, seeded
  • salt to taste
Chop everything to bits in a food processor.

This is so simple and very good.  We are eating it with chips but there are a ton of recipes where this would make a very nice addition.

It's a good thing we like them so much, because 33 more came in this week's box.

Tuesday, August 24, 2010

Canning Tomato Sauce

We don't eat many raw tomatoes.  A few, but not enough to keep up with the garden.  As they ripen on the window sill, I hull them, slice them in half and toss them into a bag in the freezer.  Then on a late August day when we have no where to go, I make sauce.

There are a million sauce recipes out there.  This is not one of them.  This is more about what I have learned over the past several years of making sauce.

1. You can add onions, peppers, garlic, etc to your recipe and it does not matter that much because when you are ready to cook with the stuff, you are adding ingredients then.  I decided to be a purist this year and go for a pure tomato taste.

2. Using several different types of tomatoes makes for a better sauce.  I think the chef people would talk about subtlety and complexity of flavor profile.  I think it tastes better.  That and we did not eat the cherry tomatoes or beefsteak tomatoes from the CSA so they got frozen and put into the mix.

3. Many canned tomato sauce recipes come out too thin.  Or you need to boil forever...  Last year we cheated and added tomato paste.  It worked.  This year I tried different approaches to cut down the fluid levels.

The first thing I did was defrost the tomatoes overnight in colanders.  I put pot lids on top of the tomatoes and weighted them down with some cans.  Overnight they dripped out 3+ quarts of tomato juice!  I am bringing the juice to a boil and will freeze it for use in place of chicken broth in recipes.

The second thing I am doing is roasting the raw tomatoes.  I cut the Romas  in quarters and drizzling some olive oil over them.  Then I baked them at 450 degrees for 15 to 20 min.  Some I left in the oven with the oven turned off to further dehydrate.  It cut way down on the fluid content and I'm hoping will add a nice flavor to the finished sauce.

4.  I did not measure or weigh the tomatoes.  I just kept going until the big stock pot was full.

5. The moment people find out that you do any sort of home canning, they will bring you jars.  Lots of jars.  They cannot bear to throw them out, but most people don't can.  Check them for chips around the rim.   I will probably never need to buy a jar again.  Lids and rings, yes.  But we have a lifetime supply of jars.

This time we got 5 and a half quarts of sauce.  I'm happy.

Monday, August 23, 2010

Sourdough

I read about how you can make your own sourdough starter.  Really?  Leave flour and water on your kitchen counter for 2 weeks and you can use what grows to bake bread?  How cool is that?  Missy Meyers has a really cool blog with a great tutorial.  John Ross also wrote a great article.

Day 1: mixed 1/2 c flour with 1/4 c warm water in a pint jar.  It was like a really thick dough so I added a bit more water.
Day 2: maybe some water separated out?   It smells fine.  Fed it.
Day 3: Phew!  Like really fragrant stinky cheese.  But lots of bubbles.  The farmer wants to name it "Audrey Jr." after the plant in Little Shop of Horrors.  I think I may have kicked the bacteria into high gear because I stirred it last night with a spoon that had been used in a jar of applesauce.  oops.  Wow. 4 hours later and it has grown.  Still smells like cheesy old sneakers...  Waiting for it to get more sour...
Day 4: lots of bubbles, and a strong cheesy odor.  Maybe a little bit more sour.  Makes your nose wrinkle up.
Day 5: Less smell, fewer bubbles, maybe separating?
Day 6: Not many bubbles at all.  More sour smelling.  Two hours later it seems to be coming back to life.
Day 7:  Audrey seems to be kind of dormant.  Smells like sourdough though.
Day 8: A few bubbles.  Not much happening.
Day 9: Separating.  Still not much happening.  Paging Audrey...
Day 10: Audrey appears to be waking up. Bubbles and a sourdough smell.
Day 11:  Audrey is alive!  Proofed her tonight so that tomorrow, we can bake.
Day 12:  I decided to bake because I wont have time for another few weeks.

Audrey did not do much overnight.  I decided that it was because she was too cool.  I put her near the simmering tomato sauce and she seemed to perk up a bit.  But still 12 hours after proofing her she still was not where I wanted.  The "sponge" increased in volume by half.  I wanted double.

I cheated and added a packet of Fleishman's yeast in addition to the sponge.  Otherwise, I followed Missy Meyer's recipe.   The point of this is to make bread.   Having trouble creating a warm spot in the house on this cool, rainy day.

I finally got it to rise (sort of) and baked it.  It has a thick crust and is soft and chewy inside.  The flavor is quite good.  That's the good news.  The bad news is that is an inch and a half high and might be able to be used as a door stop.  I was stubborn and wanted to make this bread on a weekend day.   I should have waited.  

There is some of the Audrey sponge left.  I will continue feeding her on the counter for another few days and then fridge her until we are ready to make bread again.  I'll post if I get it right.

Sunday, August 22, 2010

Tomato soup

The kid is a picky eater.  But she really likes tomato soup.  From the can.

Campbell's tomato soup ingredients: Tomato Puree (Water, Tomato Paste)Water, High Fructose Corn Syrup, Wheat Flour, Salt, Vegetable Oil (Corn, Cottonseed, Canola and/or Soybean)Flavoring, Ascorbic Acid, and Citric Acid.

I think I can make something much healthier and cheaper.  This is the recipe I found.  I'm praying that she likes it.

Ingredients
1 (14-ounce) can chopped tomatoes - I used fresh.
3/4 cup extra virgin olive oil
Salt and freshly ground black pepper
1 stalk celery, diced
1 small carrot, diced
1 yellow onion, diced
2 cloves garlic, minced
1 cup chicken broth
1 bay leaf
2 tablespoons butter
1/4 cup chopped fresh basil leaves
1/2 cup heavy cream, optional

Directions
Preheat oven to 450 degrees F.

Strain the chopped tomatoes, reserving the juices, and spread onto a baking sheet, season with salt and pepper, to taste, drizzle with 1/4 cup of the olive oil and roast until caramelized, about 15 minutes.

Meanwhile, in a saucepan, heat remaining olive oil over medium-low heat. Add the celery, carrot, onion and garlic, cook until softened, about 10 minutes. Add the roasted chopped canned tomatoes, reserved tomato juices, chicken broth, bay leaf and butter. Simmer until vegetables are very tender, about 15 to 20 minutes. Add basil and cream, if using. Puree with a hand held immersion blender until smooth.

Bummer.  She does not like it.  Fussy kid.  It's a good soup but it was too orange and was not a pure tomato enough flavor.  I am going to try again, but next time, I am going to essentially try to make soup consistency tomato paste.  

Saturday, August 21, 2010

Gazpacho

My dad loves Gazpacho.  Supposedly, when I was a little kid my Mom made it one night and my Dad ate two bowls.  The rest of us just sort of played with ours and when he left for a meeting we all took our bowls out to the compost heap and dumped them.

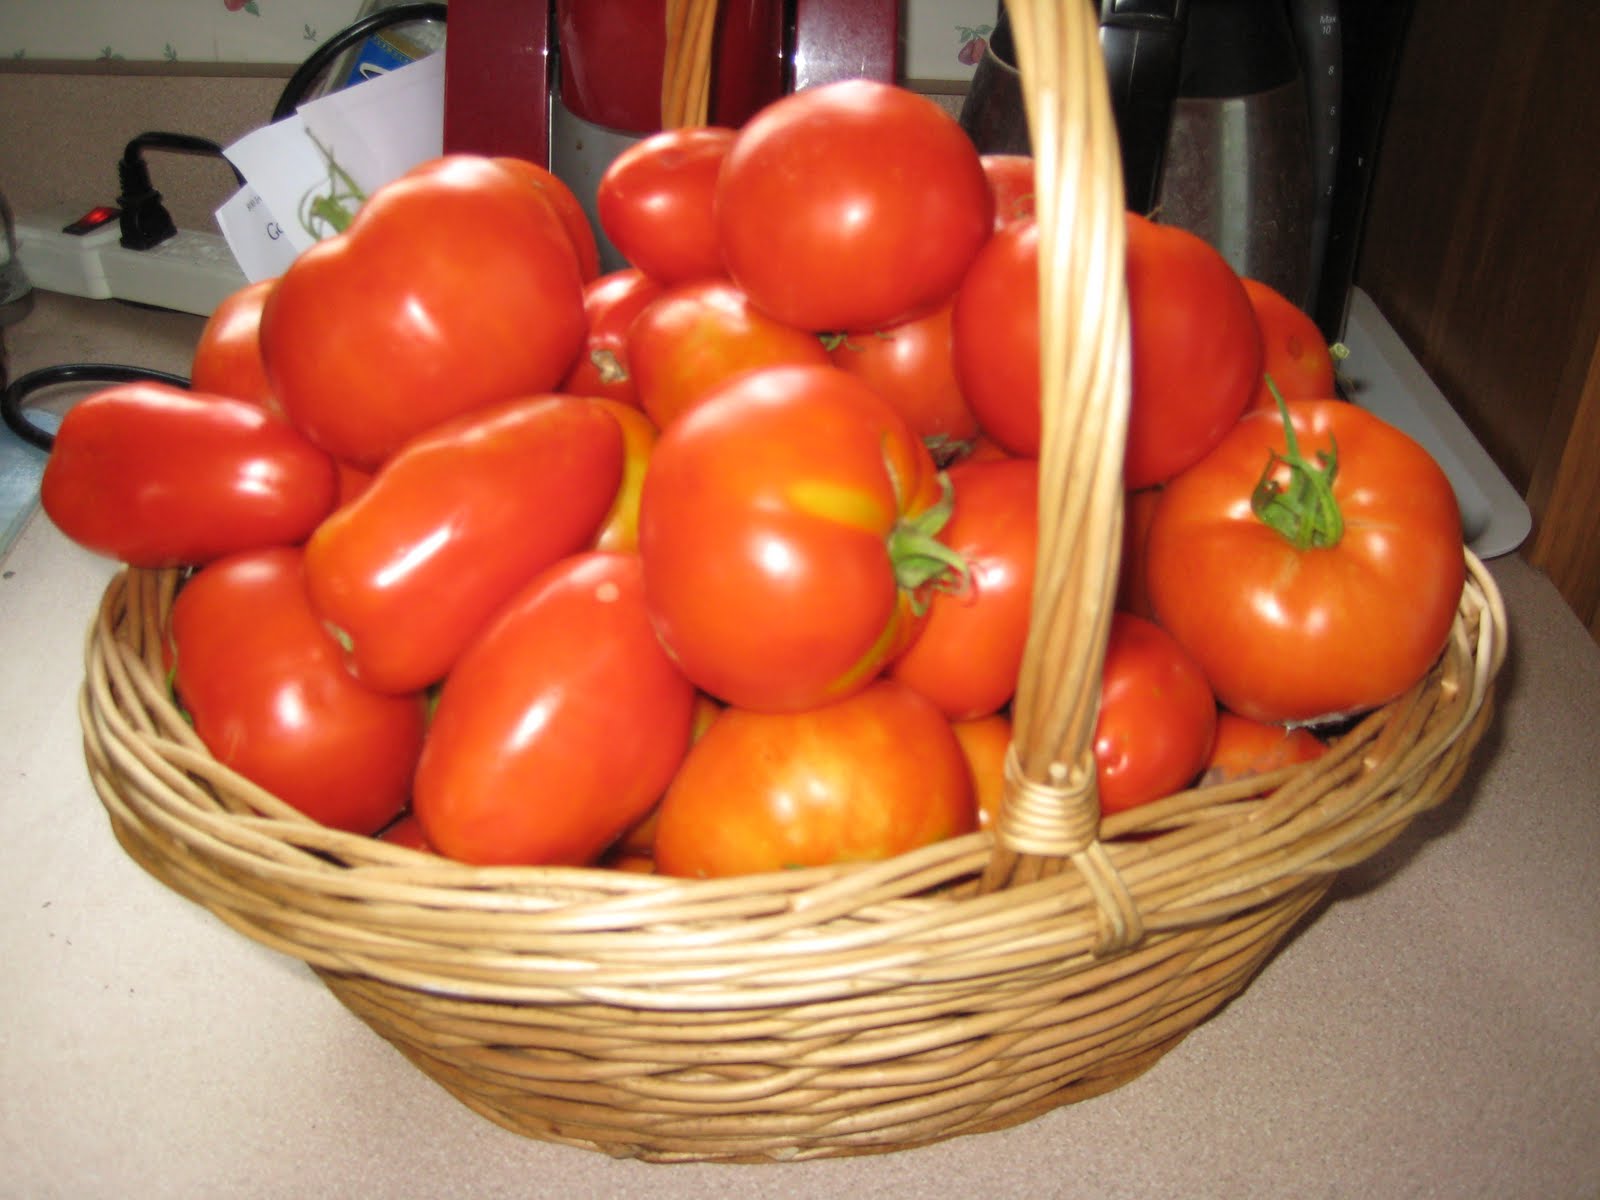
On one of the forums I visit, someone was saying that all of the restaurants involved in Restaurant Week have gazpacho on their menu.  Someone else responded with the recipe below.  I decided to try it with the masses of tomatoes that are coming in. 


Spanish cold tomato soup which is the perfect starter to a Summer meal. Gazpacho is easy to make and although ingredients may vary according to region, this is the basic Andalusian Gazpacho recipe.

Ingredients (for 4 people):
1 Kilo (2#) nice and ripe tomatoes (preferable plum tomatoes)
1/2 small onion (60 grams)
1 small green pepper
1 small cucumber (the small chubby Spanish type)
1 small cup of olive oil (extra virgin is best, but it depends on your taste)
2 desert spoons of red wine vinegar
200 grams of bread from the day before, soaked in water (I make it without bread for myself, but traditionally it calls for the bread)
1 clove of garlic, to taste (this is not included in the original recipe, but does add character)
Small portions of diced tomatoes, red and green peppers, cucumber, onion or spring onion and bread or croutons to sprinkle on top.

Put the tomatoes, onion, pepper, cucumber, vinegar, oil and bread into a blender. If you want to dilute it, add a glass of water. If you want to go for a tangy garlic taste, add a small amount of fresh garlic to the mixture before liquidizing.

Put the mixture into a bowl, add salt and pepper and leave the gazpacho to chill for at least an hour. If you want to eat it straight away, you can put some ice cubes in to cool it down. Gazpacho is a Summer dish which is meant to hydrate and cool down your body. So the colder the better!!

Serve the gazpacho en soup bowls, with the portions of diced tomatoes, pepper, cucumber, onion, croutons etc on the table, so that everyone can add them to their bowl as they prefer. Tip: you can also sprinkle diced serrano ham or hard boiled egg.

Make sure you have enough time to put it in the fridge so that you can serve your gazpacho really chilled. Use quality produce. Vary the ingredients according to your personal taste. Gazpacho makes a delicious starter to a meal.

ENJOY!

It filled the blender.  It's pretty good and would be prefect for a really hot summer day.  I think my dad would like it.

Thursday, August 19, 2010

Dead or Alive? A post about a hat.

I owe
Day 4: Just keep knitting.  Not sure I like the stripes.
Day 5: First decrease done.  Is he really going to wear this?  Really? 
Day 6: Second decrease done.  Where do you think my size 8 double pointed needles are?  Still worrying about running out of yarn.
Day 7: Went to Saturday knitting and knit like a madwoman.  Used the magic loop technique to deal with the small rounds.
Day 8: Finished knitting and wove in all the ends.

Took a break for a few days.   

 Day 12: Time to work on the eyes.  I like him.  

1st Christmas present made.

Skinny Cat

Meet "Brunswick"
We adopted Ella from the SPCA in November of 2006.  We had a cat, Ariel (I did not name her! I swear!), who was a bit neurotic and we thought she might like some company.  We picked Ella by going into the big cat room with a few dozen cats and sitting down in the middle of the room.  Kiddo was trying her best to be good, but she was still a squirming, excited two-year old.  We waited to see who would come to us.  Ella climbed right into the kid's lap and purred her head off.  She was not frightened or skittiesh at all.  She was not the most attractive cat in the bunch, but she was a love muffin.

Feed me!
She was also big.  Really big.  There was discussion of naming her "Brunswick" after the bowling ball manufacturer.  She had been left in front of the SPCA in a box.  She was spayed, de-clawed, and clearly used to being cuddled and hand fed people food.  She loved people food.  Especially cheese.

As it turned out, Ariel did not appreciate our kind gesture.   Despite our efforts to provide a good introduction, Ariel chased her through the house.  Ella claimed our bed as her own and for a few weeks she was either on my pillow or at the food bowl.  She even liked Ariel's kidney diet cat food.

She thinks she is invisible under there.
Ariel passed on and Ella was lonely.  We got two rescue kittens.  Ella liked them.  She loved their kitten food.  She did not exactly play with them, but she seemed more active.  Slowly, she lost some weight but she was still a substantial cat.

A little privacy please?
At least she was.  Six months ago she started loosing weight.  Then we got the dog.  She lost more.  1.5# in 3 months.  That is a lot for a cat.  You can feel the bumps of her spine as you pet her back.   Three months ago the vet was not concerned.  Now at 11.5 pounds, she is being tested for feline hyperthyroidism.

Skinny!
Initial lab results all came back looking good.  No diabetes, kidney, or liver disease.   We are waiting to hear back for confirmation that it is in fact hyperthyroidism.  Do you know that it costs about a grand to make your cat glow in the dark with radioactive iodine?  She won't take pills.  We have no idea how old she is.  So now we wait for definitive diagnosis and treatment options.

I hate waiting.

Wednesday, August 18, 2010

Cinnamon Bun Pancakes

Sometimes you just need to have breakfast for dinner.  Someone posted this recipe over on Low Carb Friends a few days ago.  I know.  How weird it is to pick up a pancake recipe on a low carb website?  These are pretty good.  The kid asked for seconds.

Cinnamon Bun Pancakes!

1 1/2 cups flour
3 Tablespoons sugar
1/2 teaspoon salt
4 teaspoons baking powder
1 Tablespoon cinnamon
2 eggs, beaten
1 cup milk
2 Tablespoons maple syrup
1/4 cup melted butter
1 Tablespoon vanilla

Whisk the dry ingredients together. Put all of the dry ingredients in a bowl. Add the wet ingredients and whisk together until well combined. Preheat a griddle or large sauté pan over medium heat. Cook until brown on both sides.

To make the frosting:
1 cup confectioners sugar
2 Tablespoons melted butter
2 tablespoons milk
Whisk the ingredients together until smooth and a pouring consistency. If too thick add more milk, if too thin, add more sugar.

It made about 12 small pancakes.

To balance it out, we had watermelon from the CSA box for desert.

Tuesday, August 17, 2010

Peach Butter Bread

I'm not thrilled with my first attempt at Peach Butter.  It tastes "cooked."  Still good, but not great.  Not good enough to be gifted.  So what to do with it?

This bread is pretty darn good it I do say so myself.  The peach and ginger work together very nicely.

Peach Butter Quick Bread

Ingredients:

  • 1 cup Peach Butter
  • 1/2 cup white sugar or splenda
  • 1/2 cup vegetable oil
  • 2 eggs
  • 3 tablespoons milk
  • 2 teaspoons vanilla extract
  • 2 cups all-purpose flour
  • 1 teaspoon baking soda
  • 1/2 teaspoon baking powder
  • 1/4 teaspoon nutmeg
  • 1/4 teaspoon ginger
  • 1/4 teaspoon salt
  • 1/2 cup chopped nuts (optional)

Directions

  1. Preheat oven to 350 degrees F (175 degrees C). Lightly grease two loaf pans.
  2. In a large bowl, combine the peach butter, sugar, oil, eggs and milk; beat well. Sift in the flour, baking soda, baking powder, spices, and salt; stir until smooth. Fold in the pecans. Pour batter into prepared loaf pan.
  3. Bake in preheated oven for 40-50 minutes, or until a toothpick inserted into center of the loaf comes out clean. 

Monday, August 16, 2010

My life as a squirel

Photo from Wordmagazine.uk.co
Tuesday: Blanched and froze green beans.
Wednesday: Trimmed back the basil and zipped it in the mini food processor with olive oil.  Froze it for pesto or clam sauce this winter.
Thursday: Froze 4.5 cups of pumpkin puree.
Saturday: Grated a zucchini and froze it.
Sunday: Prepped ripe tomatoes and froze them for when we are ready for sauce.  Made a double batch of soup to freeze with the sad rainbow chard and dinosaur kale.  Mariquita Farms Original Version

Looks more like salad than soup...
Bird in Hand Curried Chickpea, Lentil, and Swiss Chard Stew
1 bag dried Lentils (~3 cups)
2 Tablespoons extra virgin olive oil
2 generous pinches of dried parsley flakes (I bought them for the dog biscuit recipes)
2 bunching onions, cleaned and chopped (from the csa box)
S & P to taste 
 4 cups chicken stock (salvaged form the back of the fridge)
Heaping tablespoon curry powder 
several good splashes of Tabasco
1 large bunch rainbow chard, leaves and stems, coarsely chopped(from csa box)
1 bunch of dinosaur kale coarsely chopped. (from the csa box)
2 cans chickpeas, drained and rinsed (hiding in the pantry for who only knows how long...)
Cumin seeds and Greek-style yogurt for garnish
  1. Rinse lentils in a fine-mesh sieve.  Revive the greens by trimming the ends and allowing them to soak in cold water.  Set aside.
  2. In a stock pot, combine the oil, parsley, onion , and 1 teaspoon salt. Sweat-cook, covered, over low heat until soft but not browned- for about 3 minutes. Add the stock and bring to a simmer over moderate heat. Add the lentils, curry powder, and cayenne and stir. Simmer, covered, until the lentils are tender, about 20 minutes. (cooking time will depend upon the freshness of the lentils –older lentils take longer to cook)  Ours sucked up all the liquid, so we wound up adding 4 cups of water.
  3. Add the greens and the chickpeas and cook until the leaves are wilted, about 5 minutes more. Taste for seasoning. (this means add S&P to taste)
  4. Garnish with a spoonful of yogurt and a sprinkling of toasted cumin.
The soup rocks and made enough for two or three meals.  Soon I need to inventory the freezer.  Hopefully we will be ready for winter.  

Sunday, August 15, 2010

Gift Pumpkins

When I was a little kid we had a compost heap.  I remember that every summer, squash vines would climb out of it.  This year we had gift vines too.  They took over and I let them.  It turned out they were pumpkins.  I don't try to grow squash anymore.  The soil has some kind of silvery fungus that attacks them and they die in August.  Further, squash are so cheap at the farmers market that we can save the precious garden space for something else.

The pumpkins went nuts and this little guy turned orange really early.  It also has a funny scar.  I picked it and washed it with a bleach solution.  The I left it on the warm front porch in the sun for 10 days.  The scar hardened off.   Pick Your Own has great information about prepping fresh pumpkin.  Ours are probably jack-o-lanterns rather than pie pumpkins but you can still eat them.
 
I cut it in half and scooped out the guts.  Then I cut it in eighths and steamed it in a pot for 20 min.  Once the wedges had cooled, I peeled off the rind.  I fridged them for a day and then mashed them for a bit and tossed them in the blender.  I got 4.5 cups of pumpkin puree from the little guy.  More than enough to make a pie or bread or muffins or soup.  But not this week.  In steamy, 85 degree August heat, the thought of baking or soup is not a great idea.  In October, it will be brilliant. 

There are at least 4 more out there.  Just wait for the Jack-o-lanterns!  And, maybe the guts of these pumpkins will gift us with more vines next year...

Saturday, August 14, 2010

Tomato troubles

Last year the tomatoes across upstate NY withered and died.  This year I'm having my first experience with blossom end rot. Boo.   It seems to have left the beefsteaks alone, but the romas suffered for a while there.  It appears to primarily have affected the early fruit.  Stuff that is coming off the vine at this point seems okay.  The peppers are also affected and have not recovered.

Blossom rot is caused by a calcium deficiency, in our case  when fruit is rapidly growing and subjected to sudden drought conditions.  Early this season there was a really hot period of days and maybe I did not water enough.    Some tomatoes have the spot on the end.  Some have a rotten spot inside.  At this point I am cutting away the bad stuff and tossing them in the freezer. 

Of course on the internet there are lots of solutions to this problem that you can purchase from their website...  Or use Epsom salts...  The best solution I have read comes from: the Victory Seed Company.  Basically, leave it alone.  By the time you see the problem, the damage is done.  We still have more tomatoes than we could ever cook or eat.  In a week or so I will make our first batch of sauce for the summer. Stay tuned.

Thursday, August 12, 2010

Yarn swift

Flipped over my desk chair...
The Farmer loves me.  It's a good thing because it meant that he used to be willing to stand with a hank of yarn over his forearms while I wound it.  I'm sure he preferred it to the alternative of listening to me swear while I tried to wind it off the back of a chair.  Anyway, I'm knitting enough that it was time for a swift.  I looked on-line and they are expensive!  Way expensive.  I tried a few improvised solutions with limited success.  I finally decided to make my own.

Supplies:
1 old wood lazy Susan
6' of 1"x1" trim
8 - 1.5" wood screws
1 - 3/8" dowel

Total cost: $15 

1. Cut the 1"x1" trim in half, and then cut one of the halves in half again.  

2. Drill several 3/8" holes along the trim piece.  Space them 2" apart. Try not to drill all the way through.  We used a piece of masking tape to mark the depth on the drill bit.
3. Screw the 1"x1" trim to the lazy Susan making sure that the holes are facing up.  Don't ask.

4. Cut the dowel into four equal lengths, each approx 9" long.

It works brilliantly.  The dowels can be placed however far apart is needed for the hank to be snug.  It spins freely and allows me to wind a ball at my own pace.